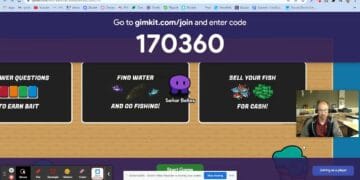
As a teacher, you know that a great unit is more than just a single lesson. It’s a journey, a cohesive narrative designed to guide students from a starting point of “I’m not sure” to a final destination of mastery. But what if you could use Gimkit to plan and execute an entire unit, from the first day to the final test, with seamless engagement and powerful data? This is the secret to next-level Gimkit unit planning.
Many of us use Gimkit for a fun Friday review game or a quick five-minute break. But by thinking of Gimkit as a structured, unit-long instructional tool, you can transform your teaching. This guide provides a strategic blueprint for Gimkit curriculum mapping, showing you how to create a series of linked Kits that build on each other, provide continuous data, and lead to better student outcomes. We’ll turn Gimkit from a fun-but-random tool into an integrated part of your sequence of instruction, all while saving you time and giving you better insights into what your students truly understand.
Table of Contents
- Stage 1: The Diagnostic Pre-Assessment (The “What Do We Already Know?”)
- Stage 2: Formative Practice & The Learning Journey
- Stage 3: The Cumulative Final Review (Bringing It All Together)
- Best Practices for Gimkit Curriculum Mapping
Stage 1: The Diagnostic Pre-Assessment (The “What Do We Already Know?”)
 Before you start a new unit, you need to know where your students are. Trying to teach without this knowledge is like trying to give directions without knowing your starting point. A Gimkit pre-assessment is the perfect way to pinpoint what students already know and, more importantly, what they don’t.
Purpose of a Gimkit Pre-Assessment
- Pinpointing Prior Knowledge Gaps: The first step of any effective lesson plan is to identify what concepts students have retained from previous units. By using a Gimkit as a pre-unit diagnostic, you can quickly and effortlessly find the knowledge gaps that need to be addressed at the class-wide or individual level.
- Informing Instruction: The data you gather from a diagnostic test is invaluable. It tells you exactly where to focus your efforts. If your students already have a solid grasp on a topic, you can move on more quickly. If they’re struggling, you can dedicate more time to scaffolding their learning. This helps you to create differentiated instruction plans right from the start.
How to Build & Run the Diagnostic Kit
- Designing the Questions: For a pre-assessment, don’t write complex, detailed questions. Focus on broad, foundational concepts from previous units that are necessary for success in the new one. Keep the questions simple and direct. For example, for a “Matter” unit, you might ask: “Which state of matter has a definite shape and volume?”
- The Best Game Mode: To get clean, individual data, you need to reduce the pressure. The best game mode for a Gimkit pre-assessment is Assignments. This allows students to complete the questions at their own pace, without the stress of a live, competitive game. It provides accurate data on a student’s first, uncoached attempt.
- Interpreting the Data: After the pre-assessment is complete, dive into the Gimkit reports. Look for the questions that were most frequently missed. This will show you the class-wide weak points. You can also analyze individual student data to identify those who need extra support. This data is the foundation of your entire unit plan.
Stage 2: Formative Practice & The Learning Journey
 Now that you know what your students need, it’s time to build the learning journey. Instead of one giant review kit, create a series of smaller, more focused Kits that align with your daily lesson plans. This is the heart of the Gimkit curriculum mapping.
Building Scaffolding Kits
- Breaking Down the Unit: Look at your unit’s learning objectives and break them into smaller chunks. For example, for a unit on fractions, you might create Kits for “Equivalent Fractions,” “Adding Fractions with Common Denominators,” and “Multiplying Fractions.” This creates a clear Gimkit sequence of instruction.
- Varying Question Types: Keep your students engaged by using different question types. Use multiple choice for conceptual understanding and text input for vocabulary or definitions. This approach not only keeps things fresh but also provides you with different types of student data to measure mastery.
Strategic Gimkit Sequence of Instruction
- The KitCollab Method: After teaching a new concept, use KitCollab to have students create their questions. This forces them to engage with the material on a deeper level and shows you exactly what they’ve learned. You can then review their submissions and approve the best ones, building a kit with your students as co-creators. This method is a great example of blended learning with Gimkit and is perfect for a Gimkit for a full unit approach.
- The Homework Assignment: Once a lesson is complete, use the Gimkit homework feature (Assignments) as a mastery check before moving on to the next topic. This low-stakes check-in provides you with quick Gimkit formative assessment strategies and allows students to practice the material at home.
Stage 3: The Cumulative Final Review (Bringing It All Together)
 After weeks of learning and practice, it’s time to prepare for the final assessment. A great Gimkit final review is more than just a game; it’s a comprehensive, high-stakes recap of the entire unit.
Creating the Ultimate Gimkit Final Review Kit
- A Comprehensive Question Bank: The best way to build a final review kit is to combine all the Kits you made for individual topics throughout the unit. Simply merge them into one. You’ll have a comprehensive, unit-long question bank ready to go.
- Leveraging the Question Bank: You don’t have to stick to just your own questions. Use Gimkit’s Question Bank to pull a few key questions from the public library to add variety and new challenges. This is a great Gimkit assignment for unit review strategy.
Running the Final Review Game
- Best Game Modes for Review: Now is the time for a high-energy, fun game. Try team-based modes like “Fishtopia” or “One Way Out” to encourage collaboration. For a truly high-stakes review, use a competitive mode like “Trust No One” to make the final challenge engaging and memorable.
- Analyzing Post-Unit Data: After the final review, pull up the report and compare it to your initial pre-assessment data. This visual proof of learning growth is a powerful tool to share with students and parents. It shows them how far they’ve come and provides evidence of their mastery learning.
Best Practices for Gimkit Curriculum Mapping
Organizing Your Kits with Folders
 A great Gimkit unit planning strategy requires a great organization system. Use Gimkit’s folder feature to keep your kits organized by subject, unit, or semester.
- A Naming Convention: Adopt a simple naming system to make searching easier. For example: [Subject_Unit#_Topic] (e.g., Science_U2_Matter_Pre-Test). You can also include the year (_24-25) to keep Kits from different school years separate. See more on using Gimkit folders here.
Keeping Kits Fresh & Up-to-Date
- The “Clone and Edit” Trick: Before a new school year, simply copy a whole unit’s folder. This is a quick way to copy a kit from one year to the next and make small adjustments without losing the original. For more help with these basics, check out our guide on how to play Gimkit yourself.
Conclusion
By moving beyond a single game, you can transform your Gimkit usage from a fun-but-random activity into a core component of your instructional design. A well-structured Gimkit unit planning provides you with a clear roadmap, continuous data, and a powerful, engaging tool to guide students from pre-assessment to mastery. This strategic blueprint will not only improve your students’ outcomes but also streamline your lesson planning process.
What’s the next unit you’ll tackle with these Gimkit strategies for a new unit? Share your ideas in the comments below, and let’s revolutionize our approach to Gimkit curriculum mapping!
