


Preparing Your Brother Printer For WiFi Connection
Before you can start printing wirelessly, there are a few things you need to do to get your Brother printer ready. It’s not too hard, but skipping these steps can cause problems later on. Let’s get started!
Checking Printer Compatibility
First things first, you need to make sure your Brother printer actually can connect to WiFi. Not all models have this feature. The easiest way to check is to look at the front of your printer or check the model number online. Look for a WiFi symbol or the words “Wireless” on the printer itself. If you can’t find either, check the user manual or the Brother website using your printer’s model number. This will tell you for sure if it supports WiFi.
Gathering Required Information
Next, you’ll need some info about your WiFi network. This includes:
- Your network name (SSID). This is the name you see when you connect devices to your WiFi.
- Your WiFi password. You’ll need this to connect the printer to your network.
- The type of security your network uses (like WPA2 or WEP). Most home networks use WPA2, but it’s good to double-check.
It’s a good idea to write this information down before you start. That way, you won’t have to go searching for it when you’re in the middle of the setup process. Trust me, it saves time and frustration.
Powering On Your Printer
This might seem obvious, but make sure your Brother printer is turned on! Seriously, it’s easy to overlook. Also, make sure it’s close enough to your WiFi router to get a good signal. If the printer is too far away, it might not be able to connect properly. A good rule of thumb is to keep it within 10-15 feet of the router during the initial setup. Once it’s connected, you can always move it to a different location if needed.
Connecting Your Brother Printer To WiFi Network
Okay, so you’ve prepped your printer, got all the info you need, and now it’s time for the main event: actually connecting your Brother printer to wifi. There are a few ways to do this, and the best method depends on your printer model and what you find easiest. Let’s walk through the most common approaches.
Using the Control Panel
If your Brother printer has a control panel with a screen, this is often the simplest way to get connected. The exact steps can vary a bit depending on the model, but here’s the general idea:
- Make sure your printer is on.
- Look for a “Settings” or “Menu” button on the control panel. It might be an icon that looks like a wrench or gears.
- Navigate to the “Network” or “Wireless LAN” settings. You might have to scroll through a few menus to find it.
- Select “Setup Wizard” or something similar. This will guide you through the process of finding and connecting to your wifi network.
- Choose your wifi network from the list of available networks.
- Enter your wifi password (also called a network key or security key). Be careful to type it correctly – it’s case-sensitive!
- Wait for the printer to connect. It should display a message indicating whether the connection was successful.
Using the Brother Printer Software
Brother provides software that can help you connect your printer to wifi, especially if the control panel method isn’t working or if you prefer using your computer. You’ll likely need to install this software from the CD that came with your printer, or download it from the Brother support website. Here’s the gist:
- Install the Brother printer software on your computer.
- Open the software and look for an option like “Wireless Setup” or “Network Connection Wizard.”
- Follow the on-screen instructions. The software will usually guide you through selecting your wifi network and entering your password.
- The software might ask you to temporarily connect your printer to your computer with a USB cable to configure the wifi settings. If so, follow the prompts.
- Once the setup is complete, disconnect the USB cable (if applicable) and your printer should be connected to wifi.
Connecting via WPS
WPS (Wi-Fi Protected Setup) is a quick and easy way to connect your printer to wifi, but it only works if your router supports WPS. Look for a WPS button on your router – it usually has the WPS logo on it. Here’s how to use it:
- Make sure your printer is on.
- On your printer’s control panel, navigate to the “Network” or “Wireless LAN” settings.
- Look for a WPS option. It might be called “WPS Push Button” or something similar.
- Select the WPS option on your printer.
- Within two minutes, press the WPS button on your router.
- The printer and router should automatically connect. The printer should display a message indicating whether the connection was successful.
Connecting your Brother printer to wifi can sometimes be a bit finicky. If you’re having trouble, double-check that you’ve entered the correct wifi password, that your printer is within range of your router, and that your router is working properly. Sometimes, simply restarting your printer and router can resolve the issue. If all else fails, consult your printer’s manual or the Brother support website for more specific troubleshooting steps. Knowing how to connect brother printer to wifi is a useful skill.
Configuring Network Settings On Your Brother Printer
Accessing Network Settings Menu
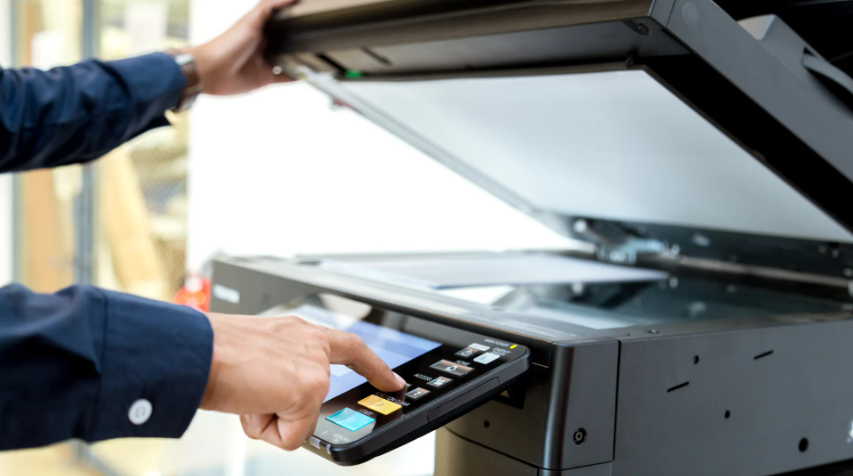
Okay, so you’ve got your Brother printer ready to connect to WiFi. Now, you need to actually get into the printer’s settings. This part can be a little different depending on your specific model, but generally, you’re looking for a “Menu” button or something similar on the printer’s control panel. Poke around! Once you’re in the main menu, you’ll probably have to scroll through a few options to find something like “Network,” “Network Settings,” or “WLAN.” It might be buried, so don’t give up too easily. Some printers have a dedicated WiFi button too, which makes things easier. If you have a touchscreen, it’s usually pretty straightforward; just tap around until you see the network options. If all else fails, check your printer’s manual – it should have the exact steps for your model.
Selecting Wireless Setup Wizard
Alright, you’ve made it to the network settings. Now what? Look for something called “Wireless Setup Wizard.” This is your friend. It’s basically a guided tour to get your printer connected. Select it, and the printer will start scanning for available WiFi networks. This might take a minute or two, so just hang tight. Once it’s done scanning, you should see a list of all the WiFi networks in range. Find yours, and get ready to enter your password. If you don’t see your network, make sure your router is broadcasting its SSID (network name). You might also need to move the printer closer to the router temporarily to get a stronger signal.
Entering WiFi Credentials
This is where things can get a little tricky, especially if your printer has a tiny screen and you’re using the arrow buttons to enter your password. Make sure you select the correct network name first. Then, carefully enter your WiFi password. Double-check it! Seriously, triple-check it! Passwords are case-sensitive, so pay attention to uppercase and lowercase letters, numbers, and special characters. It’s easy to mistype something, and then you’ll be scratching your head wondering why it won’t connect. Some printers let you use WPS (WiFi Protected Setup) if your router supports it, which is a much easier way to connect. But if you’re entering the password manually, take your time and be accurate. Once you’re sure it’s correct, confirm it, and let the printer do its thing. Hopefully, it’ll connect without any issues!
Configuring your printer’s network settings can sometimes feel like navigating a maze. Just remember to take it one step at a time, double-check your entries, and don’t be afraid to consult your printer’s manual or Brother’s support website if you get stuck. With a little patience, you’ll have your printer connected to WiFi in no time.
Testing The WiFi Connection
Printing a Network Configuration Page
Okay, so you think you’ve connected your Brother printer to your WiFi. Awesome! But how do you really know? The easiest way is to print a network configuration page. This page contains all sorts of useful information, including the printer’s IP address, the SSID of the WiFi network it’s connected to, and the signal strength.
To print this page, you’ll usually need to press a combination of buttons on the printer itself. The exact button combination varies depending on your Brother printer model, so check your printer’s manual. Seriously, dig it out or look it up online. It’ll save you a headache. Usually, it involves holding down the ‘Go’ button or the ‘WiFi’ button for a few seconds. Once printed, take a look at the page. If it shows your WiFi network’s name and an IP address, you’re probably in good shape.
Verifying Connection Status
Beyond just printing a configuration page, you can also check the connection status directly on the printer’s control panel (if it has one). Look for a WiFi icon. If it’s lit up and not blinking, that’s a good sign. Some printers even display the WiFi signal strength.
Another way to verify is through your computer. Open your computer’s settings and look at the list of connected devices on your network. Your printer should appear there, usually with its model number as the name. If you see it, that means your computer can see the printer on the network, which is exactly what you want.
Troubleshooting Connection Issues
So, you printed the configuration page, and it’s not showing your WiFi network? Or the WiFi icon on the printer is blinking like crazy? Don’t panic! Here are a few things to try:
- Double-check your WiFi password: Seriously, it’s the most common mistake. Make sure you entered it correctly during the setup process.
- Restart your printer and router: It’s the age-old tech support advice, but it often works. Turn off both devices, wait a minute, and then turn them back on.
- Move the printer closer to the router: WiFi signals can be weak, especially if there are walls or other obstacles in the way.
- Check for interference: Other electronic devices can interfere with WiFi signals. Try moving the printer away from microwaves, cordless phones, and other potential sources of interference.
If you’re still having trouble, consult your printer’s manual or Brother’s support website. They have a wealth of information and troubleshooting tips specific to your printer model. Sometimes, a firmware update can also resolve connectivity issues, so check if there’s an update available for your printer.
Installing Brother Printer Drivers On Your Computer
Okay, so you’ve got your printer connected to WiFi, which is awesome! Now, your computer needs to be able to talk to it. That’s where drivers come in. Think of them as translators, letting your computer and printer understand each other. It’s not as scary as it sounds, I promise.
Downloading Drivers From Brother’s Website
First things first, head over to Brother’s official website. Seriously, don’t go searching on random sites – you don’t want to download any sketchy stuff. Find the “Support” or “Downloads” section. You’ll need to know your printer model number (it’s usually on the front of the printer or on a sticker somewhere). Once you’ve found your model, the website should have a list of drivers available for different operating systems (Windows, Mac, etc.).
- Make sure you pick the right driver for your operating system version (e.g., Windows 10, macOS Sonoma).
- Download the full driver package, not just the basic one. It usually includes extra software that can be helpful.
- Save the file somewhere you can easily find it, like your Downloads folder or the Desktop.
Installing Drivers On Windows
Alright, you’ve got the driver downloaded. Now, let’s install it. Usually, it’s as simple as double-clicking the downloaded file and following the on-screen instructions. But sometimes, things get a little weird. If the installer doesn’t start automatically, try right-clicking the file and selecting “Run as administrator”.
Here’s a quick rundown of what you might see:
- The installer will ask you to choose a language. Pick your language, obviously.
- You’ll probably have to agree to some terms and conditions. Read them if you’re feeling ambitious, or just click “Agree”.
- The installer will search for your printer. Make sure your printer is turned on and connected to the WiFi network.
- Follow the rest of the prompts. You might need to restart your computer after the installation is complete.
Installing Drivers On Mac
Installing drivers on a Mac is usually pretty straightforward. Double-click the downloaded .dmg file. This will open a window with the installer package. Double-click the installer package, and follow the on-screen instructions. You’ll probably need to enter your administrator password at some point.
- Make sure you allow the installer to access your system settings.
- If you get a security warning, check your Security & Privacy settings in System Preferences and allow the installation.
- Restart your Mac after the installation is complete.
Installing printer drivers can sometimes feel like a chore, but it’s a necessary step to get your printer working correctly. Don’t be afraid to take your time and follow the instructions carefully. If you run into any problems, Brother’s website has a ton of helpful resources, including FAQs and troubleshooting guides.
Setting Up Your Brother Printer On Mobile Devices
Okay, so you’ve got your Brother printer connected to WiFi, and now you want to print from your phone or tablet? Makes sense! It’s actually pretty straightforward. Let’s get into it.
Using Brother iPrint&Scan App
First up, the Brother iPrint&Scan app. This is probably the easiest way to print from your mobile device. It’s free, and it works on both iOS and Android. Just download it from the App Store or Google Play. Once you’ve got it installed, open it up. The app should automatically detect your printer on the same WiFi network. If it doesn’t, you might need to manually add it by entering its IP address (you can find this on the network configuration page you printed earlier, remember?).
Once the app finds your printer, you can print photos, documents, web pages, and even scan directly to your device. It’s a pretty handy little app to have around.
Connecting Through AirPrint
If you’re an Apple user, you’re in luck! Most Brother printers support AirPrint, which means you can print directly from your iPhone or iPad without needing to install any extra apps. Just make sure your printer and your Apple device are on the same WiFi network. To print, simply open the document or photo you want to print, tap the share icon (the little box with an arrow pointing up), and select “Print.” Choose your Brother printer from the list, adjust the settings (like number of copies), and hit “Print.” Easy peasy!
Configuring Mobile Printing Settings
Alright, let’s talk about tweaking those mobile printing settings. Both the Brother iPrint&Scan app and AirPrint let you adjust things like paper size, print quality, and color settings. In the iPrint&Scan app, you’ll find these options in the settings menu. With AirPrint, they pop up right before you hit the print button. Experiment with different settings to see what works best for you. For example, if you’re printing photos, you might want to increase the print quality for better results. If you’re just printing documents, you can probably get away with using standard quality to save ink.
Mobile printing is super convenient, but it’s worth taking a minute to understand the settings. A little bit of tweaking can make a big difference in the quality of your prints and how much ink you use. Don’t be afraid to play around with the options until you find what works best for your needs.
Here are some things you might want to adjust:
- Paper Size: Make sure it matches the paper in your printer.
- Print Quality: Choose between draft, normal, and high quality.
- Color Mode: Select color or black and white.
- Number of Copies: How many copies do you need?
Maintaining Your Brother Printer’s WiFi Connection
Keeping your Brother printer connected to WiFi doesn’t have to be a headache. A little regular maintenance can save you from a lot of frustration down the road. It’s all about being proactive and keeping an eye on a few key things.
Regularly Updating Printer Firmware
Keeping your printer’s firmware up-to-date is super important for maintaining a stable WiFi connection. Think of it like updating the operating system on your phone or computer. Updates often include bug fixes, security patches, and improvements to wireless connectivity. Check the Brother support website for your printer model to see if there are any new firmware versions available. You can usually update directly from the printer’s control panel or through the Brother iPrint&Scan software on your computer.
Monitoring Network Stability
WiFi networks can be fickle. Sometimes they’re great, sometimes they’re not. If you’re having trouble with your printer’s connection, it’s worth checking the overall stability of your network. Here are a few things to look at:
- Check the signal strength of your WiFi network on other devices (phone, laptop, etc.). If other devices are also having trouble, the problem might be with your router, not your printer.
- Make sure your router is in a good location. Walls and other obstructions can weaken the WiFi signal.
- Restart your router. It sounds simple, but it often fixes a lot of connectivity issues.
Sometimes, the issue isn’t your printer or your network, but interference from other devices. Microwaves, cordless phones, and even some Bluetooth devices can interfere with WiFi signals. Try moving these devices away from your printer and router to see if it helps.
Reconnecting After Network Changes
Did you change your WiFi password? Get a new router? If so, you’ll need to reconnect your Brother printer to the network. The process is similar to the initial setup. You’ll need to go through the wireless setup wizard on your printer and enter the new network credentials. If you’re still having trouble, you might need to reset the printer’s network settings to factory defaults and start from scratch. If all else fails, consider contacting Brother support or a local printer repair service for assistance.
Wrapping It Up
So, there you have it! Connecting your Brother printer to WiFi isn’t as tricky as it might seem. Just follow the steps, and you’ll be printing wirelessly in no time. If you hit a snag, don’t sweat it—check the manual or the Brother website for help. Remember, every printer is a bit different, so what works for one might not work for another. But with a little patience, you’ll get it sorted. Now go ahead and print those documents without the hassle of wires!
Frequently Asked Questions
How do I know if my Brother printer can connect to WiFi?
You can check your printer’s manual or look for a WiFi symbol on the printer. Most Brother printers that have a screen can connect to WiFi.
What information do I need to connect my printer to WiFi?
You will need your WiFi network name (SSID) and the password for your WiFi.
Can I connect my Brother printer to WiFi without a computer?
Yes! You can use the printer’s control panel to connect it directly to your WiFi network.
What should I do if my printer won’t connect to WiFi?
Make sure your WiFi is working and that you entered the correct password. You can also try restarting your printer and router.
How can I print from my phone to my Brother printer?
You can use the Brother iPrint&Scan app or AirPrint if you have an iPhone. Just make sure your printer is connected to the same WiFi as your phone.
Do I need to update my printer’s software?
Yes, it’s a good idea to keep your printer’s software updated to fix bugs and improve performance.


