


Introduction
Video content stands as an influential and compelling mode of communication that rules today’s digital realm. Compelling video production tools enable users to reach audiences better than printed words and static visuals individually. The video editing software MiniTool MovieMaker provides an intuitive interface that enables novice users to create professional-quality videos through its basic features, which do not necessitate specialized ability or pricey software packages.
This guide will provide all the essential information about using MiniTool MovieMake, beginning with setup and fundamental operations, which include adding effects to your videos and their final export methods for different platforms.
Why Choose MiniTool MovieMaker?
The outstanding feature of MiniTool MovieMaker makes it suitable for beginners since it features a simple design along with an intuitive interface. Its simple design structure provides users with straightforward movement throughout the editing system so they avoid confusion. Free users of the software benefit from a watermark-free export method, which stands as a distinctive feature unique to the free video editor because it lets users create professional outputs without commercial logo distractions.
The software adopts multiple video and audio format capabilities, thus ensuring compatibility with regular user media content, including MP4, AVI, MOV, MP3, and their similar counterparts. The last advantage of MiniTool MovieMaker is its lightweight design that works seamlessly on basic PCs, along with requiring minimum system resources to operate. The software provides essential features that ensure its suitability as an editing solution for beginners.
Installing and Setting Up MiniTool MovieMaker
More novice users should adopt MiniTool MovieMaker since it features elements that simplify video editing processes for beginners.
- This software provides a user-friendly interface that the developers created to serve beginners. Most users can use the clean layout and drag-and-drop system to easily find all features, including the tools for people who have never edited anything before.
- Users can obtain export videos without any watermark marks when utilizing both paid and free versions of the software. Beginner video producers benefit from this important feature because they can achieve professional outcomes without any promotional logos appearing in their final content.
- The software enables users to work with diverse video and audio file types in its system. Users can import all popular media formats, such as MP4, AVI, MOV, WAV, and MP3, through MiniTool MovieMaker because it supports direct file imports without manual conversion requirements.
- The software runs efficiently because it demands only small computer system resources during installation. The software operates smoothly across most machines without interrupting performance speed, thus serving users with standard computer specifications. The combination of integrated features in MiniTool MovieMaker provides a new video editor with an exceptional software solution.
Importing Your Media
The editing cycle in MiniTool MovieMaker requires users to transfer their digital media content, including videos along with audio files, and images, into the program software. The process of managing these files before editing creates efficient workflow conditions that lead to smoother productivity.
Here’s how to get started:
Users must start their MiniTool MovieMaker editing process by adding their files, consisting of videos and audio tracks, along with images. The media library lets you import files through buttons and file drops or by pressing “Import”. MiniTool MovieMaker enables users to bring their files into the program through its support of standard formats.
You can sort your imported media clips within the media library by both renaming them individually and by using file type or usage-based sorting methods. Workplace tidiness and simple clip locating become more achievable through this method during the editing process.
The first step prior to editing requires you to control your file organization with duplicate removal while cutting away unneeded segments and consolidating similar media content. The pre-work saves time that ultimately results in a more efficient editing process.
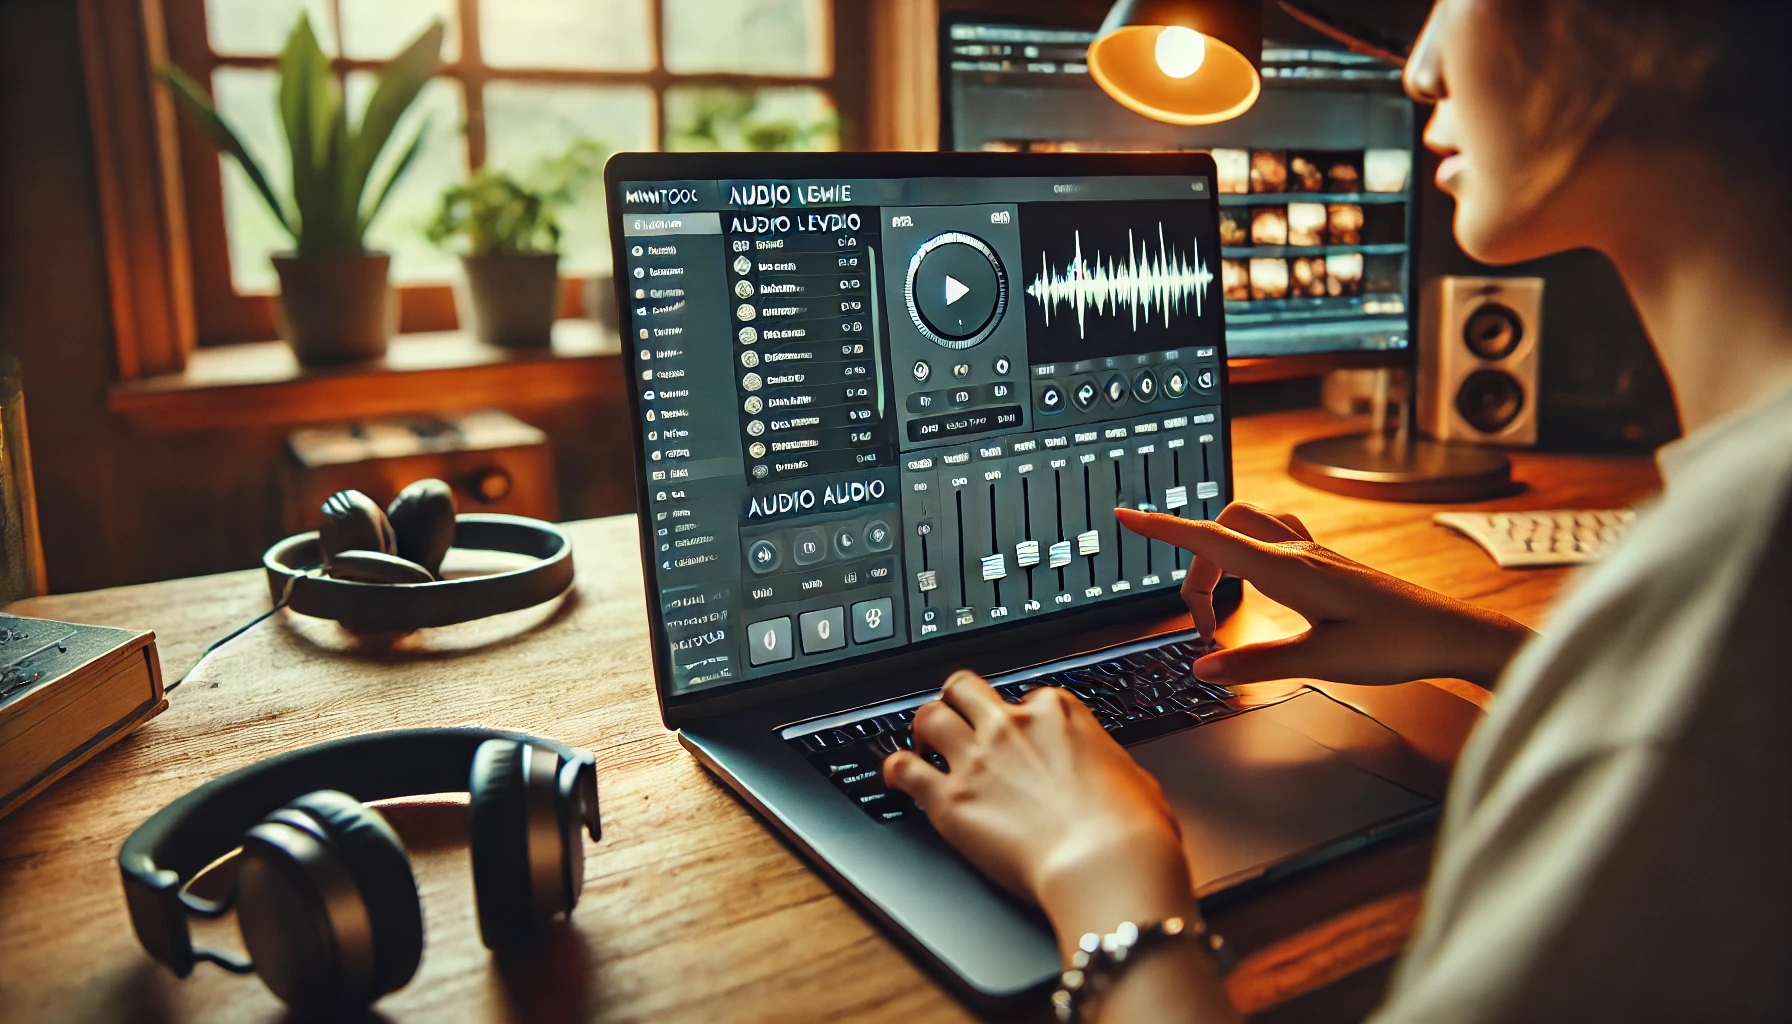
Editing Basics for Beginners
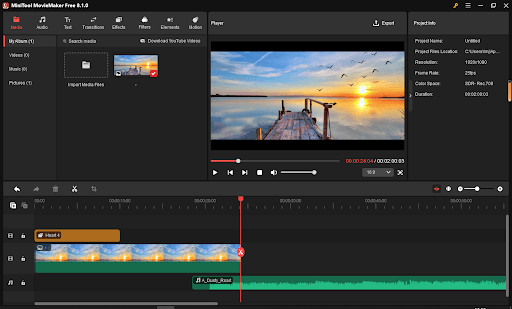
MiniTool MovieMaker provides an easy and user-friendly process to edit your videos. You can handle video editing tasks effortlessly by picking a video from the timeline area, then using software tools to efficiently cut out unnecessary segments, segment clips, or stitch different clips together.
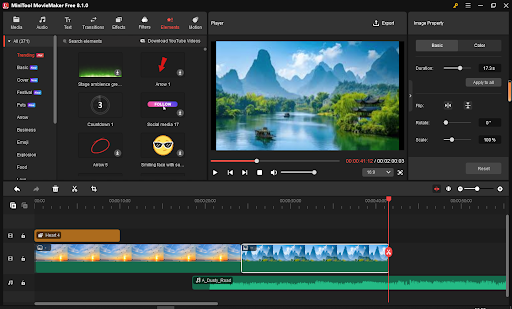
Modern templates in MiniTool MovieMaker provide users with pre-made options for adding text and captions as well as titles to improve their storytelling. The program lets you modify font type and size as well as text color and animation effects to achieve the right atmosphere for your video.
MiniTool enables you to apply professional-looking transitions with filters for producing smooth transitions between scenes. The combination of fade and slide, and zoom transitions, together with artistic filters, helps create professional-looking content.
Using audio functions, MiniTool provides users with an interface to customize sound volume levels as well as a simple method to add background music. You have full control to set music volumes up or down as well as manage video level settings, or synchronize audio correctly with visual content to achieve professional output.
Enhancing Your Video
MiniTool MovieMaker provides an easy and user-friendly process to edit your videos. You can handle video editing tasks effortlessly by picking a video from the timeline area, then using software tools to efficiently cut out unnecessary segments, segment clips, or stitch different clips together.
Modern templates in MiniTool MovieMaker provide users with pre-made options for adding text and captions as well as titles to improve their storytelling. The program lets you modify font type and size as well as text color and animation effects to achieve the right atmosphere for your video.
MiniTool enables you to apply professional-looking transitions with filters for producing smooth transitions between scenes. The professional appearance of your content can be strengthened by transitions such as fade and slide, and zoom, along with artistic filters.
Using audio functions, MiniTool provides users with an interface to customize sound volume levels as well as a simple method to add background music. You have full control to set music volumes up or down, as well as manage video level settings or synchronize audio correctly with visual content to achieve professional output.
Exporting Your Final Video
Here’s how you can manage the export process in MiniTool MovieMaker:
- Choosing export formats and resolutions:
After editing, select your preferred export format (e.g., MP4, AVI, MOV) and set the resolution (e.g., 1080p, 4K) based on where you intend to share or save the video. - Best export settings for YouTube, Instagram, etc.:
- For YouTube, export in MP4 format with a resolution of 1080p or 4K for the best quality.
- For Instagram, use MP4 format with a resolution of 1080 x 1080 for square posts or 1080×1920 for stories.
- Always choose a bitrate and frame rate that aligns with platform recommendations for optimal playback quality.
- Saving and backing up your project:
Don’t forget to save your project file before exporting to preserve your editing work for future adjustments. You can also back up your project by saving a copy on an external drive or cloud storage to avoid data loss.
Final Tips for Creating Stunning Videos
To create the best videos with MiniTool MovieMaker, follow these tips:
- Keep it simple and focused: Stick to a clear message and avoid overwhelming your audience with too many effects or visuals. A clean, straightforward video is often more engaging.
- Use consistent branding: Ensure that your video’s colors, fonts, and logo align with your brand identity. This helps reinforce your brand and makes your videos look professional.
- Make use of MiniTool’s preview and undo features: Regularly use the preview function to check how your edits look in real-time, and don’t hesitate to use the undo feature if you make a mistake. This ensures a smooth editing process.
- Practice makes perfect: The more you experiment with the tools and features, the better your video editing skills will become. Don’t be afraid to try new things and refine your technique as you go.
Conclusion
The video editing tool MiniTool MovieMaker provides exceptional features for novices who want to start editing videos. Users can utilize its simple interface because the free version allows no-watermark export and supports multiple video and audio file formats, making it available to novices and experts alike. End-users find MiniTool MovieMaker appealing because it carries a lightweight structure with straightforward installation steps, which work best for entry-level devices.
The essential procedure for MiniTool MovieMaker begins with this guideline that shows users how to add files and arrange content, and edit videos while adding special effects and transitions. The system allows users to match audio sequences and apply intro/outro templates, combined with export functions that generate various output formats useful for posting on YouTube and Instagram platforms for high-quality video production.
Simple videos along with consistent branding will maximize your benefits from using these software features, especially when combining them with preview viewing and undo capabilities. Most importantly, practice makes Perfect, so experiment with all the features available and continue improving your skills. With MiniTool MovieMaker, creating stunning videos has never been easier!
